OpenStack provides an open-source cloud infrastructure that meets NIST's definition of infrastructure-as-a-service. The Department of Computer Science & Computer Engineering's deployment of OpenStack provides our faculty and students with a convenient interface for configuring and launching arbitrary virtual machines. These virtual machines can be accessed using SSH and typically act as servers for some project.
Gaining Access
Access to the UWL CS&CE OpenStack cluster is provided to students in specific classes or to students working on independent projects or capstones. If you are enrolled in a class that will use the cloud you will be provided with account credentials by your instructor. If you are working on a project or capstone and want to make use of the cloud's capabilities, then you should request an account through your project advisor.
OpenStack Terminology
In OpenStack, an instance is a running virtual machine. Underpinning virtual machines are images, which define the filesystem that makes up the virtual machine. OpenStack surrounds each instance with a firewall that it calls a security group. Security groups are comprised of rules that define what types of traffic the firewall will permit to or from an instance. Most of OpenStack's terms resemble those used by other similar platforms, such as Amazon AWS, Eucalyptus, and so on.
Web UI
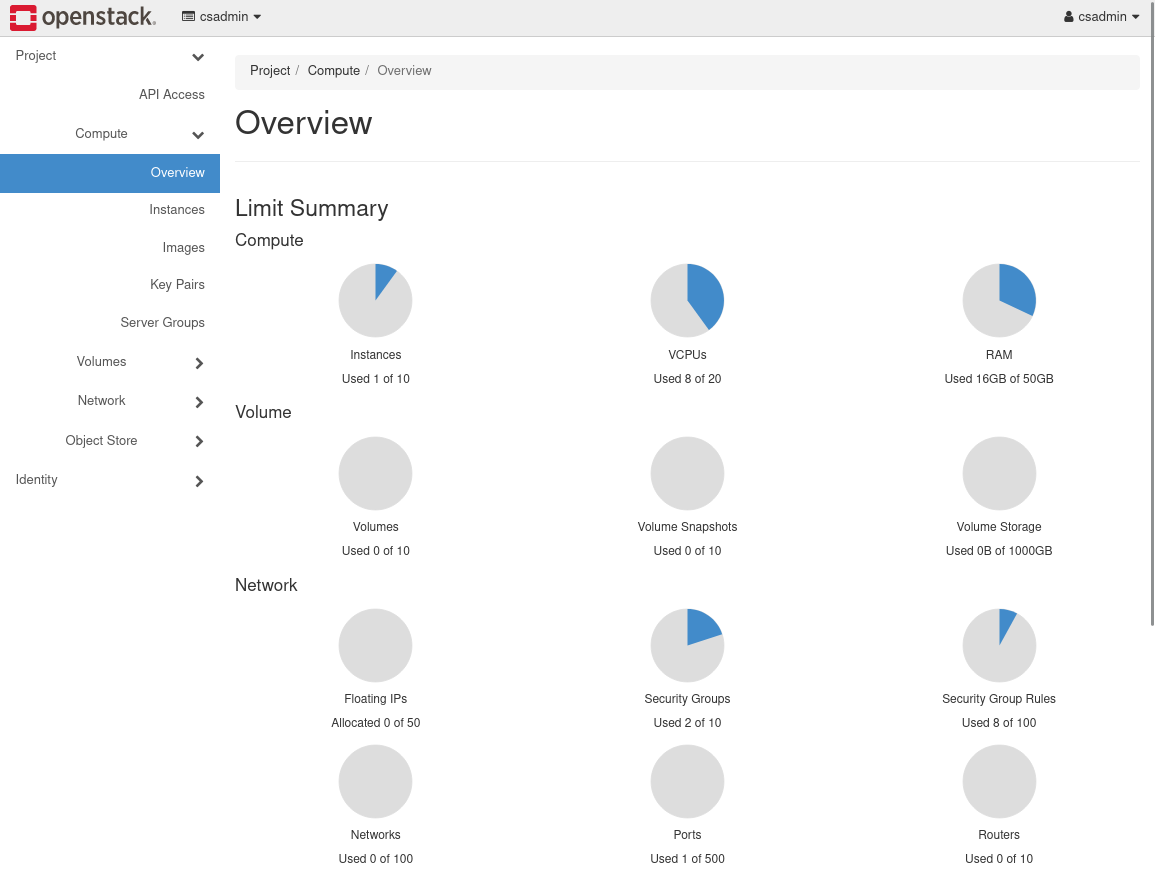
Signing into the UWL CS&CE OpenStack cluster is a matter of visiting https://cloud.cs.uwlax.edu/ with a browser. OpenStack sits behind the campus firewall, so it is necessary to either be on campus or be connected to the campus VPN before connecting. Signing in will present you with the overview shown below.
Key Pairs
While your account login credentials (i.e., OpenStack user name and password) provide access to the web UI, you will use SSH to sign into your running instances. The type of SSH authentication used here relies on public/private key pairs, so you should generate such a key pair before creating your first instance. OpenStack's key pairs interface is shown below. To display it, click on Compute and then Key Pairs on the left-hand portion of the web UI.
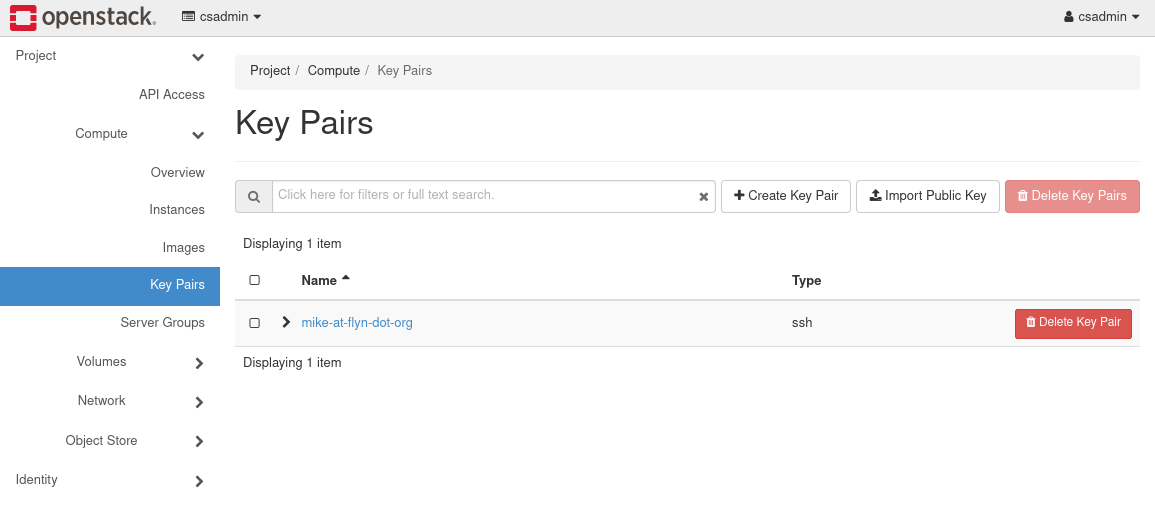
You can either import an existing SSH public key or create a new one. To create a new key, select Create Key Pair,
provide an arbitrary name, and select SSH Key as the key type. Select the Create button, and you will find that OpenStack will provide you with a private key. Save this key in a safe place, and restrict its permissions (e.g., chmod 400 KEY.pem on Unix). It is important that you protect this private key, as it will provide access to the instances you create.
Creating a single key pair is sufficient for almost all circumstances.
Security Groups
Security groups list the firewall rules that define access to instances. Every account starts with a "default" security group, but initially this group provides little access. OpenStack's security group interface is shown below. To display it, click on Network and then Security Groups on the left-hand portion of the web UI.
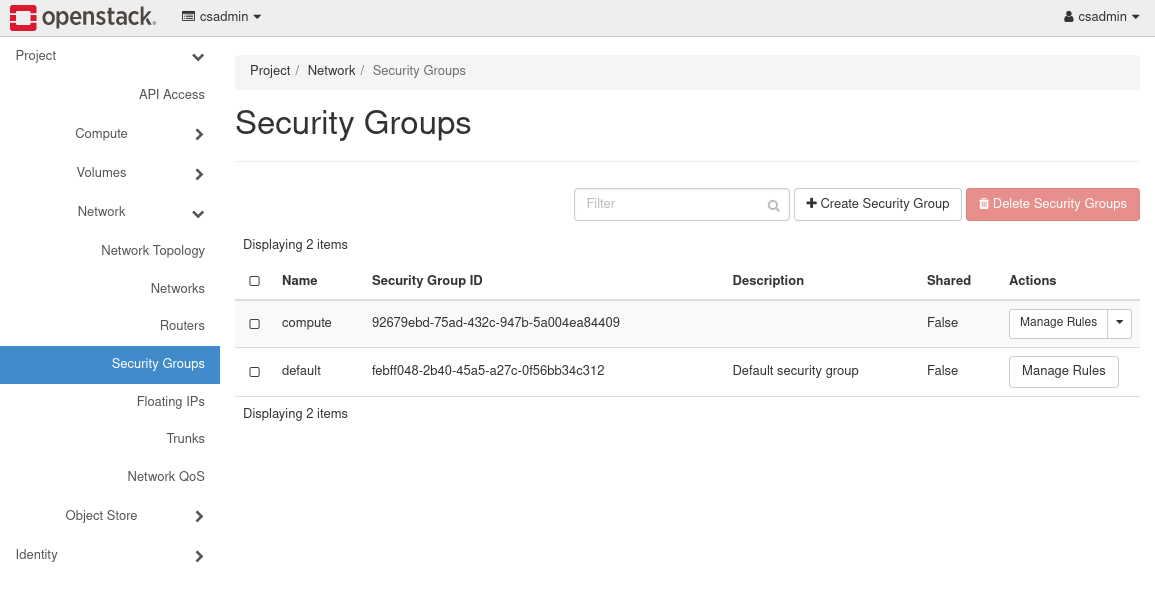
Select the Manage Rules option associated with the default group to see its current definition. Note that changes to the security group have immediate effect on running instances.
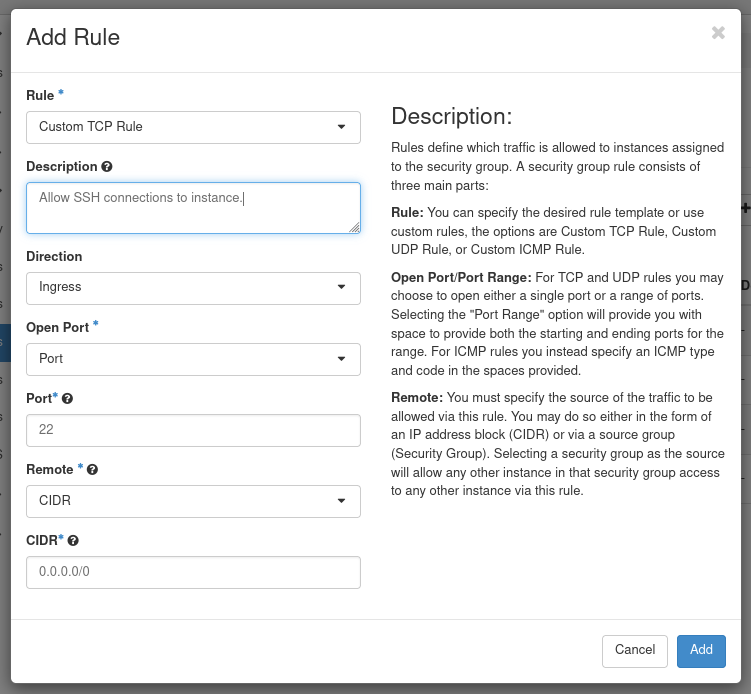
We are for the most part only concerned with Ingress rules. Each rule defines a protocol, port, and a range of IP addresses allowed access. At a minimum an SSH rule needs to be provided so that it is possible to access instances. SSH uses TCP port 22, so the following will suffice:
Instances
OpenStack's instances interface allows you to start instances, as shown in the picture below. To display this interface, click on Compute and then Instances on the left-hand portion of the web UI.
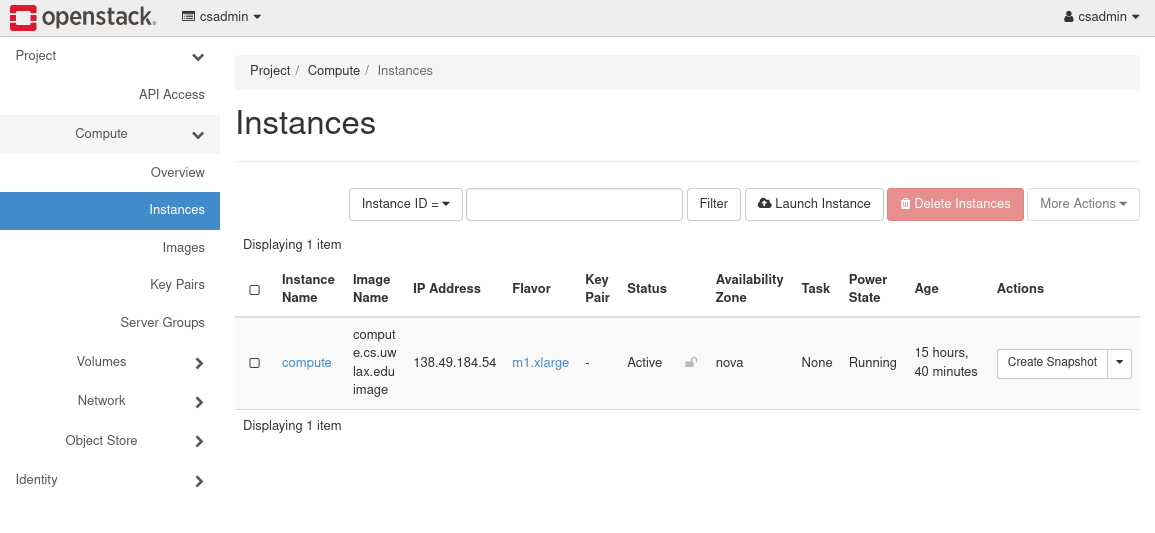
Click the Launch Instance button to launch an instance. OpenStack will present you with a series of questions to answer. This process has many options, but the required ones are:
- providing an Instance Name, which you will use to identify your instance,
- providing the boot image,
- selecting the virtual hardware flavor (how many virtual CPU cores, how much virtual memory, and so on),
- selecting the security group, and
- selecting the key pair.
Most of these are straightforward.
When selecting a boot source (Source), ensure you set Create New Volume to No. You should find a number of operating system options at the bottom of the panel. To select one, press the up-arrow to the right of the record. The CS&CE Department will provide at least Fedora and Ubuntu images. Please talk to your advisor if your project requires something else.
Select the most economical virtual hardware that will support your project (Flavor). Most projects will be able to run on a m1.tiny virtual machine.
Press Launch Instance to create and boot the virtual machine. Once the instance has launched, OpenStack will display it in its Instances interface. Note the IP address assigned to the instance; you will use this to connect to the instance. To the left of the instance, you should see a drop-down menu. Some notable options are:
- Edit Security Groups, which allows you to adjust your firewall rules.
- View Log, which allows you to view the log that records your instance's boot process.
- Delete Instance, which permanently removes your instance and its data.
Working With Instances
Connecting to an Instance
Use SSH to connect to an instance by IP address. If you created a key pair in OpenStack (see above),
then you can employ that key pair's private key by running ssh -i KEY.pem USER@IP. IP comes from OpenStack's instances interface (see above), and USER is boot image-specific: fedora for Fedora and ubuntu for Ubuntu. Both users have the ability to run sudo.
Installing Packages
The available images will contain minimal operating installs installs. Depending on your needs, you might require other packages (e.g., compilers, web servers, database servers, Python, etc). Refer to the Fedora or Ubuntu documentation for how to install packages.
Moving Files To & From an Instance
You will sometimes need to copy files to or from an instance. Refer to our documentation on scp to learn how to copy files between an instance and another arbitrary computer. If a Git service hosts your project, then it might be enough simply to clone, pull, and push between your instance and the Git service. In any case, the CS&CE Department does not backup all instance volumes, so you are responsible for maintaining backups of any important files on your instance related to your project.